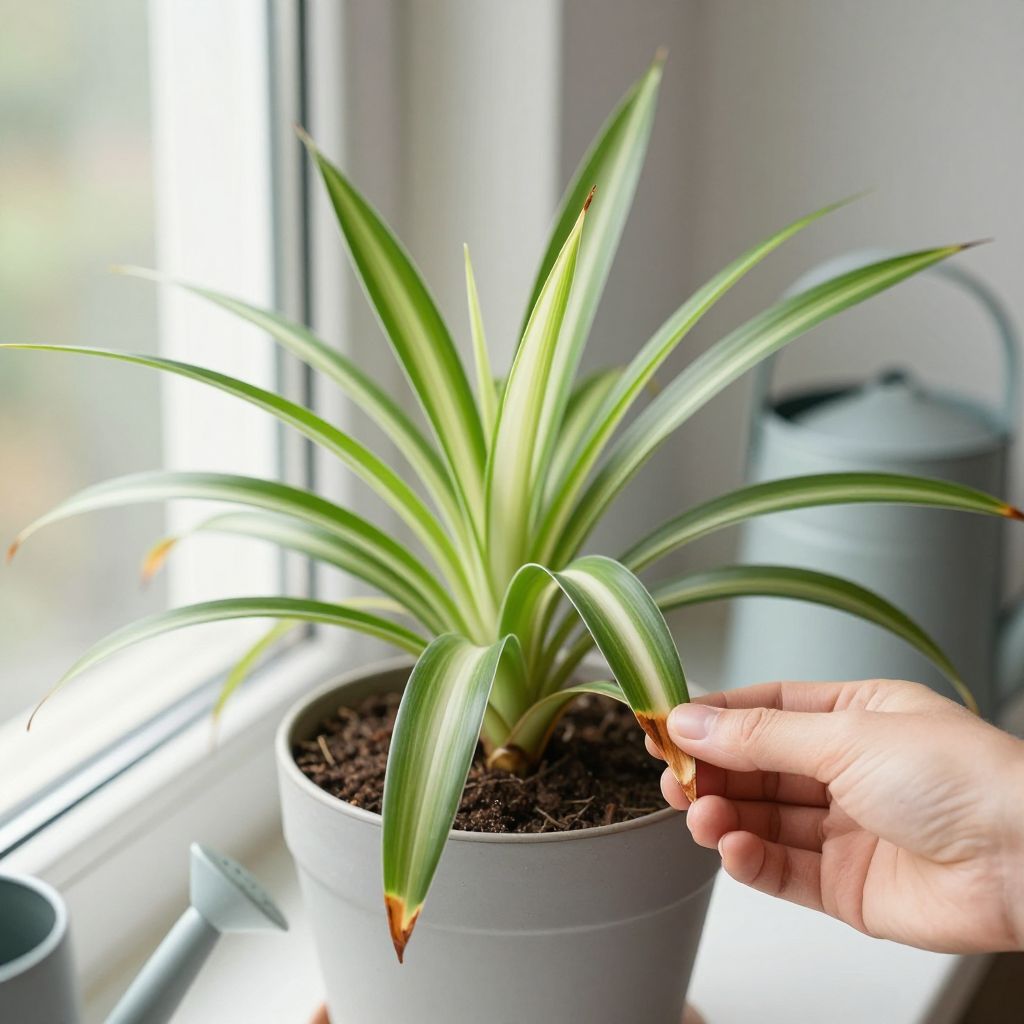
Why does my spider plant have brown tips? In most cases, the problem is not serious, but it is a sign that something in the plant’s care is off. Spider plants (Chlorophytum comosum) are resilient, yet they often show stress first at the leaf tips.
The good news is that brown tips are usually fixable. By checking water quality, watering habits, light, humidity, and fertilizer use, you can often stop the damage and help new growth stay green and healthy.
Why does my spider plant have brown tips?
Spider plant brown tips are usually caused by mineral buildup from tap water or fertilizer, inconsistent watering, low humidity, too much direct sun, or root stress. The damaged tips will not turn green again, but you can correct the cause so new leaves grow normally and the plant looks better over time.
Common causes of brown tips on spider plants
1. Fluoride, chlorine, and salt buildup
Spider plants are sensitive to minerals in water, especially fluoride. If your tap water is hard or heavily treated, the leaf tips may brown even when the plant otherwise looks healthy.
Fertilizer salts can cause the same problem. Over time, unused minerals collect in the potting mix and burn the leaf tips.
2. Inconsistent watering
Spider plants like evenly moist soil, but they do not want to sit in soggy mix. If the soil dries out too much between waterings, the plant can get tip burn. If it stays wet too long, roots may struggle to take up water properly, which can also lead to browning.
Brown tips often appear when the plant alternates between very dry and very wet conditions.
3. Low humidity
Indoor air is often drier than spider plants prefer, especially in winter when heating systems run. Dry air can cause the leaf tips to crisp and brown, particularly if the plant is also near a vent or draft.
4. Too much direct sunlight
Spider plants grow best in bright, indirect light. Strong direct sun, especially through a hot window, can scorch the leaves and dry the tips. This is more likely if the plant is suddenly moved from low light to a brighter spot.
5. Fertilizer overuse
Spider plants do not need heavy feeding. Too much fertilizer can cause salt burn, showing up first as brown, crispy tips. This is a common mistake with houseplants that are fertilized on a regular schedule without checking how actively they are growing.
6. Root stress or a crowded pot
When a spider plant becomes rootbound, water and nutrients may not move through the pot evenly. The plant may still produce leaves and babies, but the tips can brown because the roots are crowded and stressed.
Old, compacted potting mix can create a similar issue by holding too much water or not enough air around the roots.
7. Natural aging
Older leaves sometimes develop brown tips as they age, especially if the plant has had minor stress over time. A few browned tips on older leaves are not usually a sign of major trouble.
How to fix brown tips on a spider plant
Step 1: Check the water you use
If possible, switch to filtered, distilled, or rainwater for a few weeks and see whether new browning slows down. This is one of the simplest ways to test whether minerals are the problem.
If you only have tap water, let it sit out overnight before watering. This may help with chlorine, though it will not remove dissolved minerals like fluoride or calcium.
Step 2: Flush the potting mix
If fertilizer or salt buildup is likely, flush the soil thoroughly. Water the pot until plenty drains out the bottom, then repeat once more after the pot has drained for a few minutes.
Make sure the container has drainage holes. If the soil stays waterlogged after flushing, the potting mix may be too dense or the container may be too large.
Step 3: Adjust watering habits
Water when the top 1 to 2 inches of potting mix feel dry, but before the whole root ball dries out. Spider plants prefer a steady rhythm rather than extremes.
- Water deeply until excess drains out.
- Empty saucers so roots do not sit in water.
- Check the soil with your finger instead of watering by calendar alone.
In brighter rooms, plants may dry faster. In cooler or lower-light rooms, they may need water less often.
Step 4: Move the plant out of harsh sun
Place the plant in bright, indirect light. An east-facing window or a few feet back from a south- or west-facing window often works well indoors, depending on the strength of the light in your home.
If the plant is outdoors in warm weather, keep it in dappled shade or a sheltered spot with morning sun only. Avoid hot afternoon sun.
Step 5: Reduce fertilizer use
If you have been feeding regularly, pause fertilizing for a while. When you resume, use a balanced houseplant fertilizer at a lighter rate than the label maximum, especially if the plant is growing slowly.
For spider plants, less is often better than more. Overfeeding is a common cause of brown tips.
Step 6: Increase humidity if the air is dry
Raise humidity gently if your home is very dry. You do not need to create a tropical greenhouse, but a little extra moisture in the air can help.
- Group plants together.
- Use a pebble tray with water below the pot base.
- Avoid placing the plant near heaters, radiators, or air vents.
Do not mist as your only solution if the room is very dry. Misting is temporary and usually does not solve the underlying issue for long.
Step 7: Repot if the plant is rootbound
If roots are circling the pot or growing through the drainage holes, move the plant to a container one size larger. Use a fresh, well-draining potting mix that holds moisture without becoming dense.
A typical houseplant mix with added perlite is usually a good choice. The goal is airy soil that drains well but does not dry out instantly.
How to trim brown tips without harming the plant
You can trim brown tips for a cleaner look, but this is cosmetic only. Use clean, sharp scissors and follow the natural shape of the leaf tip.
- Wipe the blades with rubbing alcohol or soap and water.
- Cut only the brown section, leaving a tiny margin of brown if needed.
- Do not cut into healthy green tissue unless you are removing a badly damaged leaf.
If an entire leaf is mostly brown or damaged, remove it at the base instead. This helps the plant direct energy into healthy growth.
How to tell if the problem is serious
Brown tips alone are usually a minor issue. You should investigate more closely if you also see yellowing leaves, mushy stems, a foul smell from the pot, stunted growth, or roots that look black and soft.
Those signs can point to overwatering, root rot, or severe root stress, which need faster action than tip burn alone.
Symptoms and likely causes
- Brown, crispy tips only: water quality, fertilizer salts, low humidity, or mild underwatering
- Brown tips plus yellow leaves: overwatering, poor drainage, or root stress
- Brown tips plus scorched patches: too much direct sun
- Brown tips plus slow growth and crowded roots: rootbound plant
Preventing brown tips in the future
Once you correct the cause, new leaves should improve even though old damage remains visible. Prevention is mostly about consistency.
- Use filtered, rain, or low-mineral water when possible.
- Water when the top layer of soil starts to dry.
- Keep the plant in bright, indirect light.
- Feed lightly, only during active growth.
- Repot every couple of years or when roots become crowded.
- Choose a pot with drainage holes and a loose potting mix.
If you live in a region with very hard water, you may need to flush the pot occasionally and rely less on tap water. Local conditions matter, so watch how quickly the soil dries and how the plant responds rather than following a rigid schedule.
What to expect after you make changes
Brown tips will not turn green again, so judge success by the new growth. Healthy new leaves should emerge with cleaner green tips if the underlying problem is fixed.
Give the plant a few weeks to respond after changing watering, light, or water quality. Spider plants are forgiving, but they recover best when conditions stay steady.
Conclusion
If you are asking, “Why does my spider plant have brown tips?” start by checking water quality, watering consistency, and light exposure. Then trim the damaged tips, flush the pot if needed, and make one or two care changes rather than everything at once. For more houseplant care guidance, you may also want to read related advice on indoor plant watering basics and how to repot houseplants.