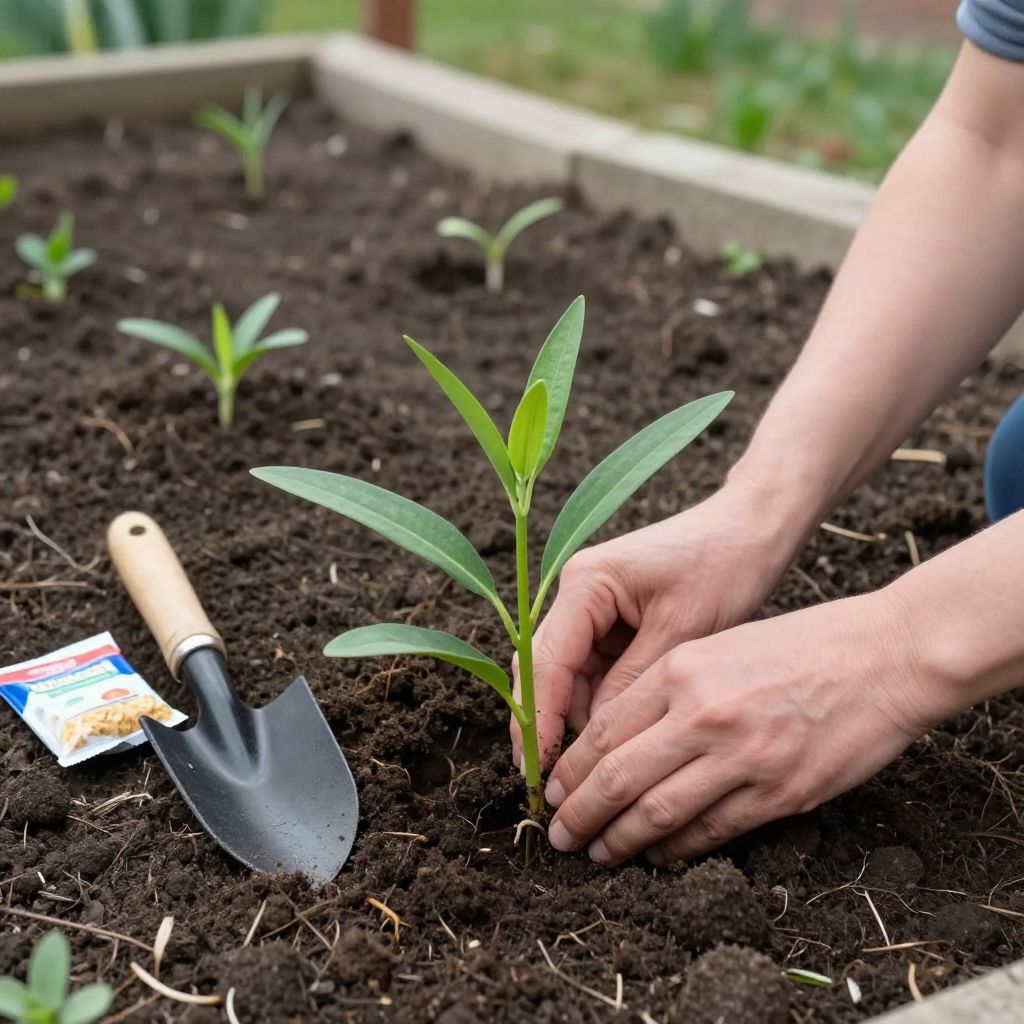
Wondering when to plant milkweed so it actually thrives and supports monarchs? The best planting time depends on your climate, whether you’re starting from seed or transplants, and how quickly your soil warms in spring.
In most gardens, milkweed is easiest to establish in spring after frost danger has passed, though fall sowing can work well for many native species. The key is matching the planting time to your local weather and giving the young plants enough moisture, sun, and space to settle in.
When to plant milkweed?
Plant milkweed in spring after the last frost if you’re using transplants or sowing seed outdoors for the first time. In mild climates, fall planting or natural winter sowing can also work. The best timing is when soil is workable, temperatures are warming, and the plant can develop roots before extreme heat or cold.
Best planting time by method
Planting milkweed from transplants
Transplants are usually the simplest option for home gardeners. Set them out in spring once nights are reliably above freezing and the soil is no longer cold and soggy.
If you live in a warm region, you may be able to plant earlier in spring. In cooler areas, wait until the soil has warmed enough for active root growth.
Planting milkweed from seed
Milkweed seed can be started indoors or sown outdoors, but the timing differs by method. Many native milkweeds benefit from cold stratification, which mimics winter and helps break dormancy.
- Outdoors in fall: Sow seed after temperatures cool, so winter naturally stratifies it.
- Outdoors in late winter or early spring: Sow as soon as the soil can be worked, if your species does not need long cold treatment or you have pretreated the seed.
- Indoors: Start seeds several weeks before your last frost date, then transplant after hardening off.
Fall planting vs. spring planting
Fall planting can be excellent in regions with cold winters and well-drained soil. The seed experiences natural weather cycles and often germinates in spring when conditions improve.
Spring planting gives you more control, especially if you want to avoid seed loss from heavy rain, birds, or runoff. It is also the safer choice if your site stays wet in winter.
How to choose the right site for milkweed
Milkweed grows best in full sun and in soil that drains well. Most types need at least 6 hours of direct sunlight daily, and many perform better with more.
Pick a spot where water does not pool after rain. Milkweed tolerates average garden soil, but it struggles in persistently soggy ground.
Soil and drainage
Good drainage matters more than rich soil. If your site is heavy clay, loosen the planting area and mix in a modest amount of compost to improve structure, not to make it overly fertile.
Avoid over-amending the soil. Very rich soil can encourage weak, floppy growth in some milkweed species and may reduce flowering.
Spacing and room to spread
Many milkweeds spread by seed or underground roots, depending on the species. Give each plant enough room so it does not crowd neighboring flowers.
- Allow airflow around plants to reduce disease pressure.
- Keep milkweed away from tiny, delicate annuals that may be shaded out.
- Plan ahead for spreading types if you want a tidy border.
How to plant milkweed successfully
Planting transplants
- Water the plant before transplanting so the root ball is evenly moist.
- Dig a hole about as deep as the root ball and slightly wider.
- Set the plant at the same depth it was growing in the pot.
- Backfill gently and firm the soil lightly.
- Water thoroughly to settle the roots.
- Mulch lightly, keeping mulch a few inches away from the stem.
Do not bury the crown too deeply. Milkweed can rot if the stem base stays too wet.
Sowing seed outdoors
For direct sowing, prepare a weed-free area and press the seed into the soil surface or cover it very lightly, depending on the species and packet directions. Many milkweed seeds need light contact with the soil but should not be buried deeply.
Keep the seedbed evenly moist until germination. Drying out during sprouting is one of the most common reasons seed fails.
Starting seed indoors
If you start milkweed indoors, use a clean seed-starting mix and small pots or trays with drainage. Many species germinate better after cold stratification, so follow the needs of the specific milkweed you are growing.
Once seedlings emerge, give them strong light so they do not stretch. Move them outdoors gradually over 7 to 10 days before planting in the garden.
Growing conditions milkweed prefers
Sunlight
Full sun is ideal. In partial shade, milkweed may survive but often produces fewer flowers and can become leggier.
Water
Newly planted milkweed needs regular moisture until roots establish. After that, most species are fairly drought-tolerant and prefer deep, occasional watering over frequent shallow watering.
Check the soil before watering. If the top inch or two is still moist, wait.
Fertilizer
Milkweed usually does not need much fertilizer. In fact, too much nitrogen can lead to lush leaves and fewer blooms.
If your soil is poor, a small amount of compost at planting time is usually enough. Avoid heavy feeding unless a soil test shows a real need.
Common mistakes to avoid
- Planting too early in cold, wet soil: Roots may rot before the plant establishes.
- Choosing a shady site: Weak growth and fewer blooms are common.
- Overwatering established plants: Milkweed prefers moisture while young, but not constantly wet soil.
- Using too much fertilizer: This can reduce flowering and create soft growth.
- Disturbing roots too much: Some milkweeds dislike transplant shock, so handle them gently.
Pruning, maintenance, and cleanup
Milkweed is generally low-maintenance, but a little seasonal care helps keep it healthy. Remove damaged stems as needed and cut back dead growth at the end of the season if your species and climate call for it.
If you want to support wildlife, leave some seed pods in place until they naturally open or until late season. Just be aware that some species can self-seed readily.
Managing self-seeding
If you do not want milkweed spreading around your garden, deadhead spent flowers before pods form or remove pods before they split open. This is especially helpful in smaller beds.
Pests and diseases to watch for
Milkweed is often grown for pollinators, but it can still run into problems. Aphids are common, especially on tender new growth, and they may cluster on stems and buds.
In many cases, a strong spray of water can knock aphids off. Encourage beneficial insects and avoid broad-spectrum insecticides, which can harm monarch caterpillars and other pollinators.
Root and stem problems
Poor drainage can lead to root rot or stem decline. If plants yellow, wilt, or collapse in wet soil, improve drainage and reduce watering rather than adding more fertilizer.
Good spacing and airflow also help prevent fungal issues, especially in humid climates.
Can you plant milkweed in containers?
Yes, but choose a large container with excellent drainage and enough depth for the root system. Container-grown milkweed dries out faster than in-ground plants, so check moisture regularly, especially during hot weather.
Use a quality potting mix rather than garden soil, and place the container in full sun. Be prepared to repot or divide if the plant outgrows its container.
Regional timing tips
Your local climate should guide the calendar more than any fixed date. In colder regions, wait until after frost and soil warming in spring. In mild-winter regions, fall planting may be a smart option, especially for native species adapted to seasonal cold.
If you are unsure, ask your local extension office or native plant nursery which milkweed species perform best in your area and whether they prefer fall sowing, spring sowing, or indoor starting.
Conclusion
The best time to plant milkweed is usually spring after the last frost, but fall sowing can be just as successful in the right climate. Focus on sun, drainage, and steady moisture while the plant establishes, and you’ll give it the best chance to thrive.
If you want to keep learning, look for more guidance on native pollinator plants and simple seed-starting techniques that match your growing zone and garden conditions.