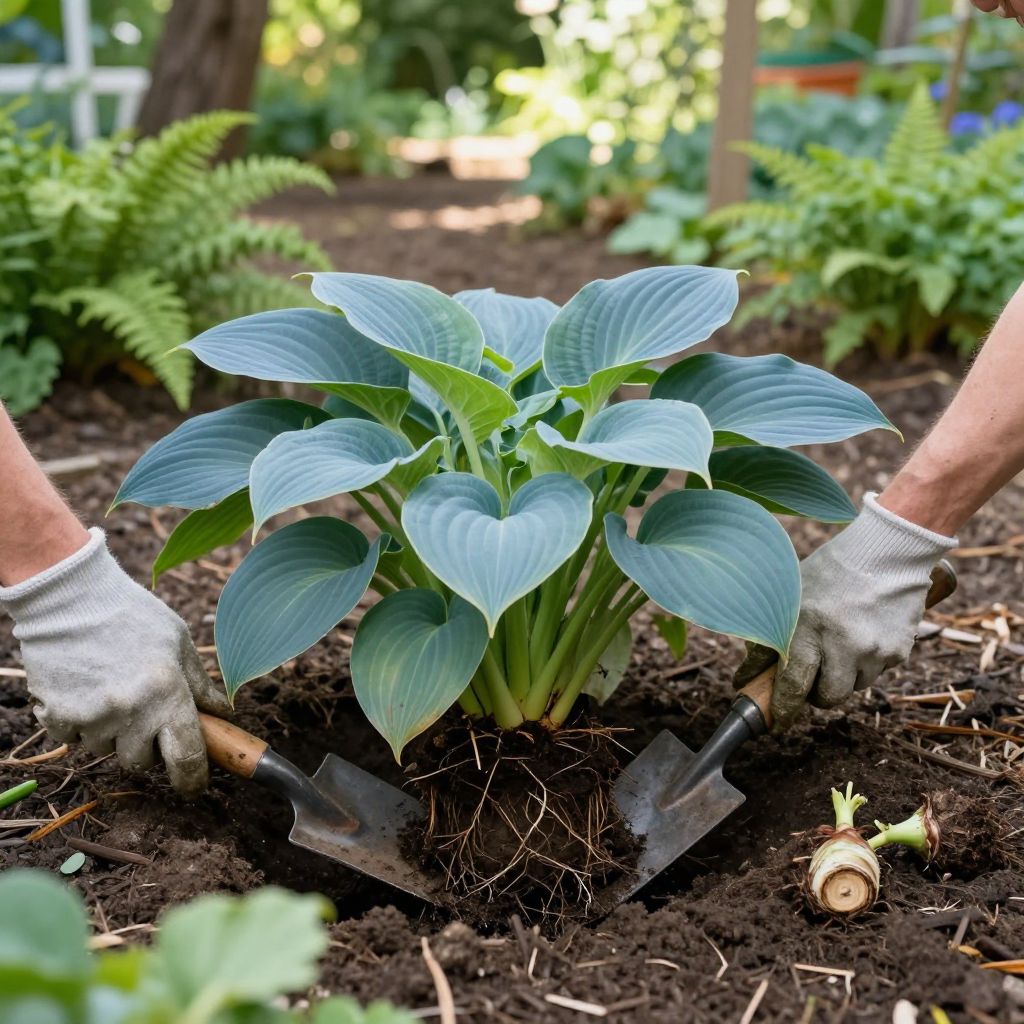
Wondering when to transplant hostas without stressing the plants or losing a season of growth? The best timing depends on your climate, but hostas usually move most successfully in cool weather when the soil is workable and the plant is not actively pushing tender new leaves.
In most gardens, early spring and early fall are the safest windows. The goal is to give the roots time to re-establish before summer heat or winter freeze, while keeping the plant evenly moist and shaded enough to recover.
When to transplant hostas?
The best time to transplant hostas is in early spring as new shoots emerge, or in early fall when temperatures cool and the soil is still warm. Avoid moving them in hot, dry weather if possible. If you must transplant during summer, do it on a cool, cloudy day and water carefully afterward.
Why timing matters for hostas
Hostas are hardy perennials with thick roots and fleshy crowns that resent unnecessary stress. When you move them at the right time, they recover quickly and often look better within a few weeks.
When timing is poor, the plant may wilt, stall, or lose leaves faster than it can replace them. The biggest risks are heat, drought, and root damage during active growth.
Best seasonal windows
- Early spring: Ideal as the eyes or shoots are just emerging and before the leaves unfurl fully.
- Early to mid-fall: Good in many climates because cooler air reduces stress and roots can settle in.
- Late spring to summer: Possible, but more stressful unless weather is mild and moisture is reliable.
- Late fall or frozen ground: Not recommended because roots cannot establish well.
How to know your hosta is ready to move
You do not need to wait for a special size or age, but established clumps transplant more safely when they are healthy and well watered. A hosta that is overcrowded, shading a walkway, or outgrowing its spot is usually a good candidate.
Look for these signs:
- The clump has become too large for the space.
- Leaves are receiving too much or too little sun in the current location.
- The plant is crowding nearby perennials.
- You want to divide and rejuvenate an older clump.
When not to move hostas
- During a heatwave or drought
- When the soil is frozen or waterlogged
- While the plant is already badly wilted
- Right before a long period of extreme weather
How to transplant hostas step by step
Hostas are forgiving, but a careful move improves recovery. Prepare the new site first so the roots spend less time exposed to air and sun.
- Water the plant the day before if the soil is dry. Moist roots lift more easily and suffer less damage.
- Choose a cool time of day, ideally morning or late afternoon.
- Dig wide around the clump to preserve as many roots as possible. Start 6 to 12 inches from the crown for smaller plants; larger clumps need more room.
- Lift the clump gently and keep the root ball intact if you can.
- Replant at the same depth it was growing before. Do not bury the crown too deeply.
- Backfill with loosened soil and firm it lightly to remove air pockets.
- Water thoroughly so moisture reaches the root zone.
- Mulch lightly with 1 to 2 inches of organic mulch, keeping it away from the crown.
Tools that make the job easier
- Spade or garden fork
- Hand trowel
- Watering can or hose with a gentle spray
- Sharp knife or pruning saw for dividing large clumps
- Mulch such as shredded bark or leaf mold
Should you divide hostas when transplanting?
You can transplant a hosta whole, or you can divide it at the same time if the clump is large. Division is useful when you want more plants, need to reduce size, or want to refresh an older clump that has become crowded in the center.
For best results, each division should have several healthy shoots and a good portion of roots. Very small divisions may survive, but they usually take longer to fill out.
Simple division tips
- Use a clean, sharp spade or knife.
- Separate the clump into manageable sections.
- Keep roots attached to each section whenever possible.
- Replant divisions promptly and water them well.
Soil, light, and drainage after transplanting
Hostas do best in rich, moisture-retentive soil that still drains well. They are often grown in partial shade, though many varieties tolerate more sun in cooler climates if the soil stays evenly moist.
When you transplant, improve the planting site only as needed. A little compost mixed into the backfill can help, but avoid creating a hole that acts like a water-filled bathtub in heavy clay soil.
Good site conditions
- Partial shade to filtered light for many hostas
- Even moisture without standing water
- Loose, organic soil
- Protection from hot afternoon sun in warmer regions
What to avoid
- Deep shade so dense the plant stays weak and sparse
- Constantly soggy soil that encourages crown rot
- Exposed, windy sites that dry the leaves quickly
- Heavy mulch piled against the crown
Aftercare: helping hostas settle in
The first few weeks after transplanting matter most. Your goal is to keep the root zone evenly moist while the plant rebuilds fine roots.
- Water deeply after planting and check moisture regularly.
- Keep the soil damp, not saturated.
- Watch for drooping leaves in hot weather; temporary wilting can happen while roots recover.
- Remove badly damaged leaves if they collapse or rot.
- Avoid heavy feeding right away unless your soil is very poor.
If you transplanted in spring, the hosta may leaf out slowly at first and then catch up. If you moved it in fall, the top growth may fade naturally as temperatures drop, but the roots will still be establishing underground.
Common transplant problems and how to fix them
Wilting after transplanting
Some wilting is normal, especially on sunny or windy days. Shade the plant temporarily, water deeply, and make sure the root ball is not drying out.
Leaves turning yellow
Yellowing can happen from transplant shock, too much sun, or poor drainage. Check the soil first. If it stays wet for days, improve drainage rather than adding more water.
The plant stalls and does not grow
Hostas may pause while roots recover. Give them time, keep moisture steady, and avoid disturbing the crown again. Growth often resumes once the plant re-establishes.
Slugs and snails
Freshly moved hostas can be attractive to slugs and snails, especially in damp shade. Remove hiding spots, water in the morning, and inspect leaves regularly for damage.
Can you transplant hostas in summer?
Yes, but only if you are careful. Summer transplanting is harder because heat and sun increase water loss faster than the roots can replace it. If summer is your only option, choose a cool spell, move the plant quickly, and provide extra shade and moisture afterward.
For summer moves, a cloudy day is better than a bright one. A temporary shade cloth, an overturned nursery pot, or nearby taller plants can help reduce stress for a few days.
How long does it take hostas to recover?
Recovery depends on plant size, weather, and how much root was preserved. Small, lightly disturbed hostas may perk up within days. Larger clumps or divided plants can take several weeks to settle and may look uneven for a while.
Do not rush to judge success by the first week alone. As long as the crown stays firm and the roots remain moist, most healthy hostas rebound well.
Quick checklist before you transplant
- Pick a cool, cloudy day if possible.
- Water the plant beforehand if the soil is dry.
- Prepare the new hole before lifting the plant.
- Keep the crown at the same depth.
- Water deeply after replanting.
- Mulch lightly and monitor moisture for several weeks.
Conclusion
If you are asking when to transplant hostas, aim for early spring or early fall whenever your local weather is mild and the soil is workable. Move them carefully, keep the crown at the right depth, and water consistently while they recover. If you want to learn more about caring for shade perennials, you may also enjoy related garden reading on dividing perennials and choosing the best shade plants.