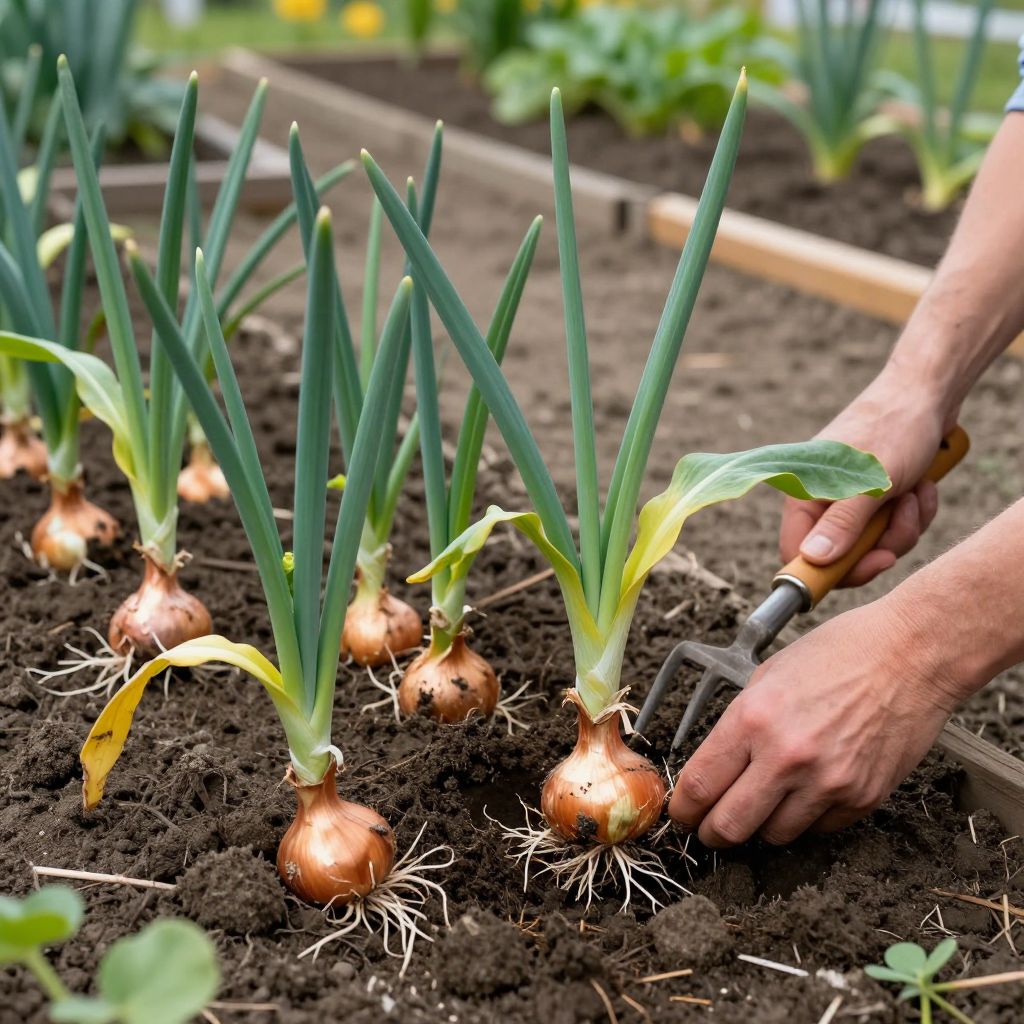
Wondering when to harvest shallots? The right time depends on how the plants are growing, not just the calendar. Shallots are ready when the tops begin to yellow, flop over, and dry down while the bulbs have formed full skins. Harvesting at the right stage helps them store longer and taste better.
If you pull them too early, the bulbs may be small and prone to rot. If you leave them too long in wet soil, the outer skins can split or the bulbs can start to deteriorate, so a little timing and observation go a long way.
When to harvest shallots?
Harvest shallots when about half to two-thirds of the tops have yellowed, bent over, and started to dry, and the bulbs feel firm with papery skins forming. In many gardens this is roughly late summer, but maturity varies with variety, planting time, weather, and growing conditions.
How to tell shallots are ready to dig
Shallots give several visible clues when they are mature. The main signal is top growth slowing down and beginning to die back naturally.
Look for these signs
- Yellowing tops: The leaves turn pale green, then yellow, then brown.
- Flopping foliage: The necks soften and the tops bend over.
- Dry outer skins: The bulb feels covered in papery layers rather than soft, green tissue.
- Firm bulbs: Mature shallots feel solid when gently pressed.
- Reduced growth: New leaf production slows or stops.
Do not rely on top dieback alone if your plants are stressed by heat, drought, or disease. A plant can look tired before the bulbs are fully sized, so check the bulbs themselves before you harvest everything.
Check bulb size without disturbing the crop too much
If you are unsure, gently brush away a little soil from one or two bulbs near the edge of the bed. Mature shallots should have well-developed bulbs with dry, papery outer layers. If the bulbs still look thin and the skins are soft, give them more time.
What happens if you harvest shallots too early or too late?
Timing matters because shallots continue to size up until the tops naturally die back. Harvesting too soon usually means smaller bulbs and shorter storage life, while waiting too long can reduce quality, especially in damp conditions.
If you harvest too early
- Bulbs may be undersized.
- Necks may stay thick and slow to dry.
- Storage life is usually shorter.
- The outer skins may be thin or incomplete.
If you harvest too late
- Outer skins may split.
- Bulbs can begin to rot in wet soil.
- They may be more likely to sprout again if conditions stay moist.
- Storage quality often drops.
In dry weather, leaving shallots in the ground a little longer is often harmless. In wet or humid weather, however, mature bulbs should come out promptly once the tops have mostly died back.
Best conditions for a good harvest
Healthy growing conditions make harvest timing easier because the crop matures more evenly. Shallots prefer full sun, well-drained soil, and steady moisture while they are actively growing.
Soil and drainage
Shallots do best in loose, fertile soil that drains well. Heavy clay can hold too much water around the bulbs, which increases the risk of rot and makes lifting harder. If your soil is dense, work in compost before planting and avoid overwatering as harvest approaches.
Watering as harvest nears
Keep watering consistent during bulb development, then reduce it once the tops begin to yellow. A drier finish helps the skins toughen and improves curing. Do not leave the bed soggy, especially in the final few weeks before harvest.
Sunlight and spacing
Shallots need plenty of sun to size up properly. Crowded plants may stay smaller and mature unevenly, so good spacing helps you get a more uniform harvest. Healthy spacing also improves airflow, which can reduce disease pressure near the end of the season.
How to harvest shallots step by step
Harvesting shallots is simple, but a gentle approach protects the bulbs and helps them store well. Choose a dry day if possible.
- Wait until most tops have yellowed and fallen over.
- Loosen the soil beside the bulbs with a garden fork or hand fork.
- Lift the bulbs carefully instead of pulling hard on the tops.
- Shake off loose soil, but do not wash the bulbs.
- Lay them in a single layer in a dry, shaded, airy place to cure.
If the soil is very loose, you may be able to lift shallots by hand. In heavier soil, a fork is safer because it reduces the chance of slicing into the bulbs.
Best tools to use
- Garden fork or hand fork
- Gloves
- Clean crate, tray, or mesh rack for curing
- Pruners or scissors for trimming tops after curing
Curing shallots after harvest
Curing is the drying period that helps shallots store well. Freshly dug bulbs need time for the necks and outer skins to dry before you trim and store them.
How to cure them properly
- Keep them out of direct sun, which can scorch the bulbs.
- Use a dry, airy spot such as a shed, garage, porch, or covered frame.
- Spread them out so air can move around each bulb.
- Leave tops and roots attached during curing.
Curing usually takes one to several weeks, depending on humidity and airflow. The shallots are ready for storage when the necks are dry and tight and the outer skins feel papery.
How to know curing is finished
When cured, the tops should be dry enough to trim, and the necks should not feel soft or damp. If the bulbs still feel moist or the necks are thick and green, give them more time.
Common problems that affect harvest timing
Sometimes shallots do not mature as neatly as expected. Weather, pests, and disease can all change when and how you should harvest.
Wet weather
Prolonged rain near harvest can encourage rot and make curing harder. If the tops are mostly down and the bulbs are sized well, it is usually better to lift them rather than wait for perfect conditions.
Downy mildew and leaf disease
If the foliage collapses early from disease rather than natural maturity, the bulbs may still be small. In that case, assess the bulbs individually. If they are firm and mostly sized up, harvest them sooner and cure carefully.
Bulbs splitting or rotting
Split skins or soft spots often mean the crop stayed too long in wet soil or was damaged during lifting. Handle bulbs gently, cure them in good airflow, and discard any that are soft or moldy.
Very small bulbs
Small bulbs can result from poor soil, overcrowding, too little sun, or early stress. If the tops have died back but the bulbs are still tiny, harvest anyway and use them sooner rather than trying to keep them in the ground too long.
How shallot harvest timing changes by climate
There is no single harvest date that works everywhere. In cooler climates, shallots may mature later, while in warm regions they can finish earlier. Wet summers can also speed up dieback or increase disease pressure.
Use the plant itself as your guide. Watch for top yellowing, soft necks, and firm bulbs, then adjust your timing based on local weather. In very humid areas, harvesting a little early is often safer than waiting too long.
What to do after harvest
Once cured, trim the tops to about 1 to 2 inches if you plan to store the bulbs, and brush off any remaining dry soil. Keep only sound bulbs with intact skins and no soft spots.
Storage basics
- Store in a cool, dry, dark place with good airflow.
- Use mesh bags, crates, or hanging bundles rather than sealed containers.
- Check stored bulbs regularly and remove any that soften or sprout.
Shallots with damaged skins or thick necks are best used first. Perfectly cured bulbs last much longer than those harvested wet or handled roughly.
Quick harvesting checklist
- Wait for yellowing, falling tops.
- Check that bulbs feel firm and look well formed.
- Harvest on a dry day if possible.
- Lift gently with a fork instead of tugging hard.
- Cure in shade with good airflow.
- Store only fully dried, healthy bulbs.
If you want to improve next season’s harvest, note when your shallots started to yellow, how the weather affected them, and whether the bulbs were crowded or underfed. That record makes it much easier to judge when to harvest shallots in your own garden next year. For more bulb-growing guidance, you may also want to read related advice on how to grow onions successfully and how to cure and store harvested alliums.