Wondering when to plant artichokes so they establish well and produce strong buds? Timing matters because artichokes are cool-season perennials in mild climates and often grown as annuals where winters are colder. Plant too early in cold, wet soil and roots struggle; plant too late and summer heat can reduce growth and bud quality.
The best planting time depends on your climate, but the goal is the same: give artichokes cool weather to root in and enough time to grow before extreme heat or hard frost arrives. With the right timing, rich soil, and steady moisture, you can grow healthy plants and harvest tender buds.
When to plant artichokes?
Plant artichokes in early spring after the last hard frost in colder regions, or in fall to early winter in mild-winter climates where plants can establish during cool weather. You can also start seeds indoors 8 to 12 weeks before your local planting window, then transplant when conditions are suitable.
Best planting time by climate
Artichokes perform best when they grow through cool, mild weather. The exact planting window changes with your local frost dates and summer temperatures, so use your climate as the guide rather than a fixed calendar date.
Cool or cold-winter climates
If your area has freezing winters, plant artichokes in spring after the soil has warmed and the danger of hard frost has passed. Young plants need time to establish before the heat of summer, but they also dislike cold, soggy soil.
In these regions, artichokes are often treated as annuals or short-lived perennials. Starting them indoors gives you a head start and helps you fit their long growing season into a shorter climate window.
Mild-winter climates
In areas with mild winters and cool springs, fall planting is often ideal. Plants can root in during the cooler months, then grow strongly as temperatures rise in late winter and spring.
Where winters are gentle, artichokes may live for several years. In that case, planting in fall or very early winter can help them settle in before the main growth flush.
Hot-summer climates
If summers are hot and dry, aim to get plants established before prolonged heat arrives. Artichokes can become stressed when temperatures climb, especially if they are young or newly transplanted.
In these regions, choose the coolest part of the planting season and provide afternoon shade if your site gets intense sun and heat. Mulch and consistent watering become especially important.
How to start artichokes: seeds, seedlings, or divisions
Artichokes can be started from seed, bought as transplants, or propagated from offsets and divisions. The best method depends on how much time you have and whether you want a faster harvest.
Starting from seed
Seeds are the most economical option, but they require planning. Start them indoors 8 to 12 weeks before your outdoor planting time so seedlings are sturdy enough to transplant.
Use a well-draining seed-starting mix and keep the soil evenly moist, not waterlogged. Seedlings usually need bright light and cooler indoor temperatures than many warm-season crops.
Buying transplants
Transplants are the easiest choice for beginners. They reduce the time to harvest and help you avoid the most delicate early seedling stage.
Choose compact, healthy plants with sturdy stems and no yellowing, wilting, or pest damage. Avoid root-bound plants if possible, since artichokes dislike being cramped for too long.
Propagating from offsets or divisions
If you already have an established artichoke plant, you may be able to separate offsets or divide the crown. This is a useful way to clone a productive plant, but it works best when the plant is vigorous and the weather is mild.
Make sure each division has roots and healthy shoots. Replant quickly so the roots do not dry out.
Site and soil requirements for strong artichokes
Artichokes need full sun, fertile soil, and excellent drainage. They are large, hungry plants, and poor soil or standing water can quickly slow them down.
Sunlight
Give artichokes at least 6 hours of direct sun daily. In very hot climates, a site with morning sun and light afternoon shade can help reduce stress.
Soil
Use deep, rich soil that drains well. A loamy texture is ideal, but you can improve average garden soil by mixing in compost before planting.
Artichokes do best in soil that stays evenly moist but never stays soggy. If your soil is heavy clay, consider raised beds or mounded rows to improve drainage.
Compost and organic matter
Work several inches of compost into the planting area before setting out plants. Compost improves soil structure, feeds soil life, and helps the soil hold moisture without becoming compacted.
A well-prepared bed matters more than heavy feeding later. Strong early root growth usually leads to better plants and better buds.
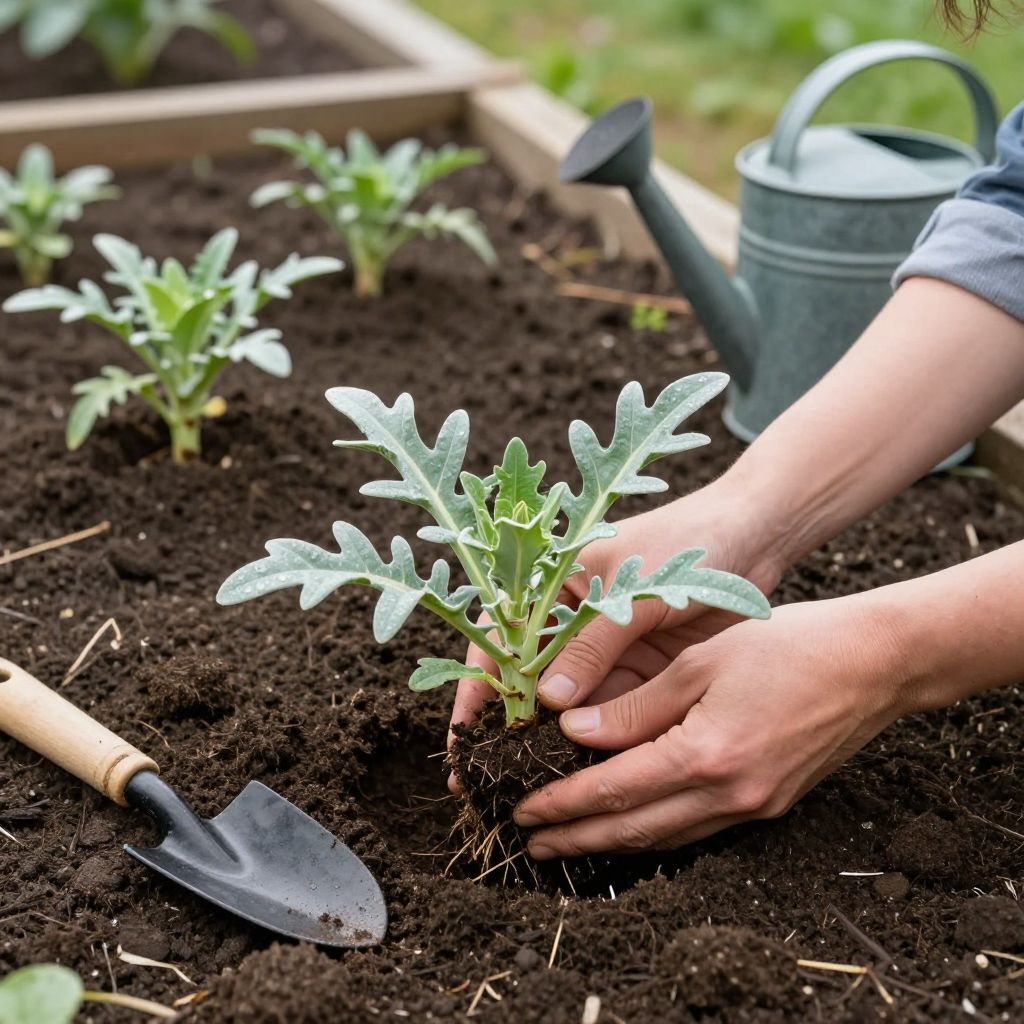
How to plant artichokes step by step
- Choose a sunny site with rich, well-drained soil.
- Amend the bed with compost and break up compacted soil.
- Water seedlings or transplants before planting so roots are hydrated.
- Dig a hole deep enough for the root ball and wide enough to spread roots comfortably.
- Set the plant at the same depth it was growing in its container.
- Backfill gently, firm the soil, and water thoroughly.
- Mulch around the plant to conserve moisture and suppress weeds.
Space artichokes generously, since mature plants can become large. Good airflow helps reduce disease pressure and makes maintenance easier.
Watering and feeding after planting
Newly planted artichokes need consistent moisture while they establish. The soil should stay evenly moist, especially during the first several weeks after transplanting.
Once established, artichokes still prefer regular watering, particularly as buds begin to form. Dry spells can lead to tough buds, smaller harvests, or premature flowering.
Practical watering tips
- Water deeply rather than giving frequent shallow sprinkles.
- Check the soil before watering; the top inch may dry out, but the root zone should not be bone dry.
- Use mulch to reduce evaporation and keep soil temperatures steadier.
- Avoid wetting foliage late in the day if disease is a concern.
If your soil is naturally rich, a light side-dressing of compost during the season may be enough. Overfeeding with nitrogen can produce lots of leaves but fewer buds, so aim for balanced growth rather than lush, floppy foliage.
What to do after planting: care that improves harvests
Artichokes are not difficult once established, but they do respond to consistent care. Small problems early on can affect bud production later.
Mulching
Apply a 2- to 4-inch layer of organic mulch, keeping it a few inches away from the crown. Mulch helps conserve water, moderate soil temperature, and reduce weeds.
Weeding
Keep the bed weed-free while plants are young. Weeds compete for moisture and nutrients, and they can crowd the base of the plant, reducing airflow.
Pruning and cleanup
Remove damaged or yellowing leaves as needed. In perennial plantings, cut back old growth after harvest or as the plant enters dormancy, depending on your climate and growing system.
In colder regions, winter protection may be needed for perennial crowns. In mild climates, old foliage can be cleaned up to encourage fresh growth.
Common mistakes when planting artichokes
Most artichoke problems start with timing or site conditions. Avoid these common errors to give your plants a better start.
- Planting in cold, wet soil before the ground has warmed enough.
- Waiting too long in hot climates, which can expose young plants to heat stress.
- Choosing a shaded site that limits growth and bud production.
- Planting in poorly drained soil that stays soggy after rain.
- Letting seedlings become root-bound before transplanting.
- Skipping mulch and then struggling with moisture swings and weeds.
Pests and diseases to watch for
Artichokes are fairly sturdy, but they can still face pests and disease, especially when crowded or stressed. Healthy spacing, good drainage, and careful watering prevent many issues.
Common pests
Aphids, slugs, snails, and sometimes caterpillars may feed on young growth. Check plants regularly, especially in damp weather or sheltered gardens.
Hand-picking, encouraging airflow, and keeping the bed tidy can help. If aphids appear, a strong spray of water may dislodge them before they build up.
Common diseases
Root rot and fungal leaf problems are more likely in wet, poorly drained soil or where plants are crowded. The best prevention is simple: plant in well-drained soil, water at the base, and avoid overwatering.
When to harvest artichokes
Harvest artichokes when the buds are full-sized but still tight. If the bracts begin to open or the bud looks loose, it is past peak eating quality.
Cut the bud with a short stem attached, using clean pruners or a sharp knife. Regular harvesting encourages the plant to keep producing side buds.
Signs your artichokes are ready
- The bud feels firm and compact.
- The outer bracts are still closed tightly.
- The bud has reached a good size for the variety you are growing.
Simple seasonal plan for planting artichokes
If you want an easy way to time the crop, work backward from your local weather. Start seeds indoors first, transplant at the right moment, then keep the plants growing steadily through their cool-season window.
- Check your average last frost date or first frost date.
- Start seeds indoors 8 to 12 weeks before transplanting.
- Move plants outdoors only when temperatures and soil conditions are suitable.
- Mulch, water consistently, and watch for pests.
- Harvest buds before they open.
Conclusion
When to plant artichokes comes down to your climate: spring after frost in cold regions, or fall to early winter in mild-winter gardens. Give them sun, rich soil, good drainage, and steady moisture, and they can reward you with strong growth and high-quality buds. Check your local frost dates, prepare the bed now, and choose the planting window that gives your artichokes the coolest, most forgiving start.
For more help with vegetable timing and garden planning, you may also want to read related guides on seasonal planting and soil preparation.