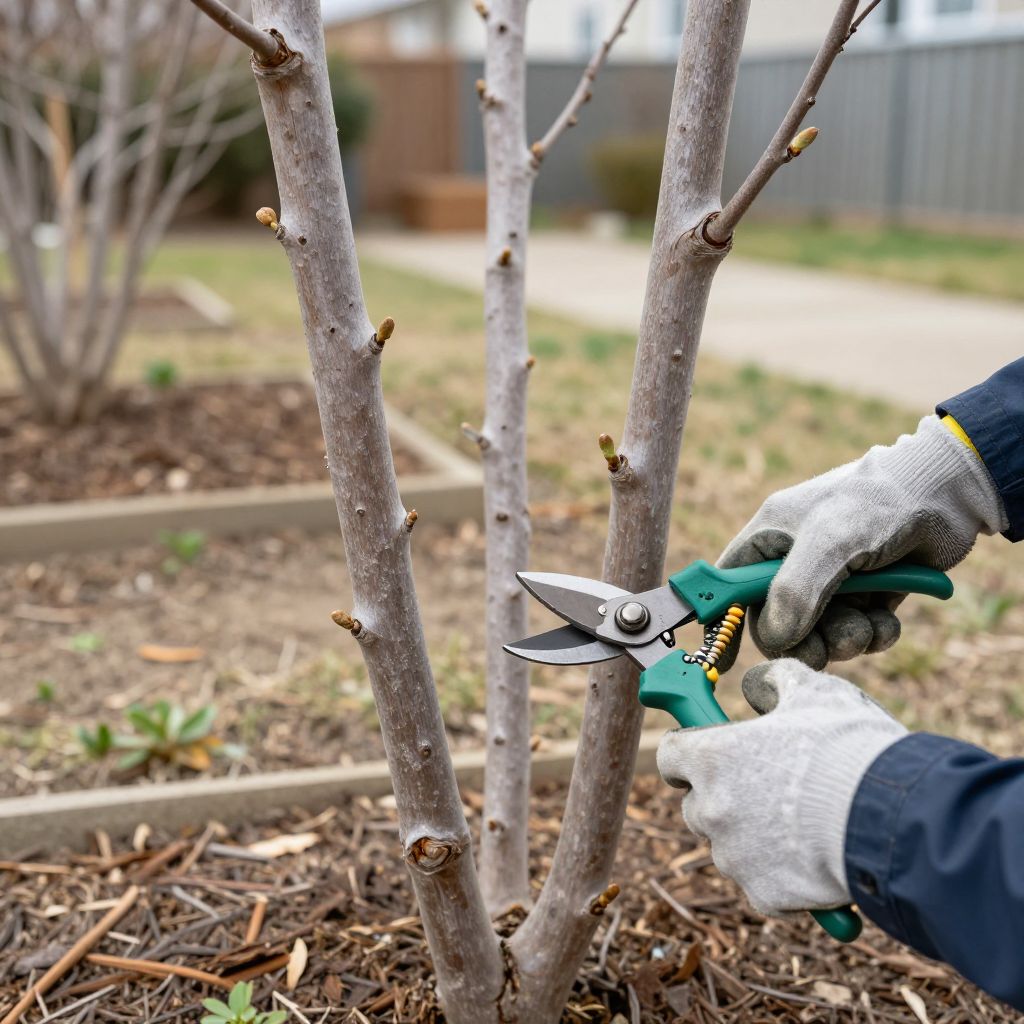
Wondering when to prune crepe myrtle without ruining the bloom display or leaving ugly stubs? The short answer is late winter to very early spring, just before new growth starts. That timing lets you see the branch structure, reduces stress on the plant, and avoids removing the flower buds that form on new wood.
Pruning at the wrong time, or pruning too hard, can lead to weak regrowth and the common “crepe murder” look. With a few simple rules, you can shape your tree or shrub, improve flowering, and keep it healthy for years.
When to prune crepe myrtle?
The best time to prune crepe myrtle is late winter to early spring, while the plant is dormant and before buds begin to swell. In most climates, that means after the coldest weather has passed but before active growth starts. Avoid heavy pruning in fall, and do not shear it hard in summer if you want the best bloom and natural shape.
Why timing matters for crepe myrtle pruning
Crepe myrtles bloom on new season growth, so pruning just before spring growth encourages fresh shoots that can flower later in the season. Pruning too early in fall can stimulate tender growth that may be damaged by cold. Pruning too late in spring can remove developing shoots and delay flowering.
The best seasonal window
- Late winter: ideal in many regions once severe freezes are unlikely.
- Very early spring: still acceptable if buds have not fully opened.
- Summer: only light cleanup, such as removing broken or crossing branches.
- Fall: generally avoid major pruning.
If you live in a colder climate, wait until the risk of hard frost is mostly past. In warmer regions, you can often prune earlier, but still aim for dormancy rather than active growth.
How much should you prune?
For most crepe myrtles, the goal is selective pruning, not hard cutting. Remove dead, damaged, rubbing, or crowded branches, and shorten only what is needed to shape the plant. A light to moderate prune keeps the natural vase shape and encourages strong flowering stems.
What to remove first
- Dead, broken, or diseased wood.
- Branches that cross or rub against each other.
- Thin shoots growing inward toward the center.
- Low suckers or unwanted basal shoots, if they are crowding the plant.
- Any branches that spoil the overall shape or block a walkway.
Avoid topping the plant by cutting all stems to the same height. That practice creates weak, crowded growth and can make the plant more vulnerable to storm damage.
How to prune crepe myrtle the right way
Use clean, sharp tools and make cuts just above a bud or branch junction. The aim is to guide the plant’s natural structure, not force it into a boxy shape.
Tools you may need
- Hand pruners for small stems
- Loppers for thicker branches
- A pruning saw for larger limbs
- Gloves and eye protection
Step-by-step pruning method
- Start by removing dead or damaged wood.
- Step back and look for the plant’s natural main stems.
- Thin out crowded interior branches to improve airflow.
- Shorten long shoots only where needed to balance the shape.
- Make clean cuts just outside the branch collar or just above an outward-facing bud.
For larger plants, it helps to prune in stages rather than removing too much at once. This is especially useful if the crepe myrtle has been neglected for years.
Common pruning mistakes to avoid
Crepe myrtles are often overpruned because people want more flowers or a tidier look. In reality, too much cutting usually causes the opposite effect.
- Topping the canopy into “knuckles” or stubs.
- Pruning heavily in fall, which can encourage tender regrowth.
- Removing too many stems at once.
- Leaving stubs that die back and invite disease.
- Forgetting to disinfect tools if you are cutting diseased wood.
If your plant has already been topped, the best fix is usually to shift toward better pruning over time. Remove weak or crowded shoots gradually, and let the plant rebuild a healthier framework.
Should you prune young crepe myrtles differently?
Yes. Young plants need training, not heavy reduction. During the first few years, focus on creating a strong structure with several well-spaced trunks or a single trunk if that is the form you want.
Training a young plant
- Remove suckers from the base if they are not part of the desired form.
- Choose the strongest, best-placed stems to keep.
- Eliminate branches that cross or grow inward.
- Wait to do major shaping until the plant is established.
Young crepe myrtles often need only light correction pruning. Overpruning early can delay the development of a balanced canopy.
What if your crepe myrtle is overgrown?
If the plant has become too tall, crowded, or awkwardly shaped, do not try to fix everything in one season. A gradual approach is safer and usually produces better results.
Rejuvenation approach for older plants
- Remove dead and damaged wood first.
- Thin out the oldest, least productive stems.
- Reduce height carefully by cutting back to a side branch, not by topping.
- Repeat light corrective pruning over several seasons if needed.
This slower method helps maintain flowering and reduces the shock that can come from severe cutting.
How climate affects pruning time
Your local climate matters more than the calendar. In warm areas, crepe myrtle may begin growing earlier, while in colder regions it may stay dormant longer.
Adapt the timing to your area
- Warm climates: prune in late winter before buds break.
- Cooler climates: wait until the danger of hard frost is mostly over.
- Areas with unpredictable spring weather: prune when you can see dormant buds beginning to swell, but before leaves emerge.
If you are unsure, watch the plant rather than relying only on the month. The right time is usually when the crepe myrtle is still dormant but close to waking up.
Watering, mulch, and aftercare after pruning
After pruning, crepe myrtles usually need only basic care. Keep the root zone evenly moist if the weather is dry, but avoid waterlogging the soil. A layer of mulch can help moderate soil temperature and conserve moisture.
Good aftercare habits
- Water deeply during dry spells, especially for newly planted shrubs or trees.
- Keep mulch a few inches away from the trunk.
- Watch for vigorous suckers or crowded new shoots and remove extras if needed.
- Do not rush to fertilize unless the plant clearly needs it and your soil supports it.
Healthy crepe myrtles usually perform best in full sun and well-drained soil. Poor drainage, shade, or constant moisture can reduce flowering and encourage weak growth.
Problems to watch for after pruning
Most pruned crepe myrtles recover well, but it helps to monitor the plant for stress or disease. Look for dieback beyond the cut, unusual spotting on leaves later in the season, or weak, overly dense regrowth.
Common issues
- Dieback from cuts made too far into old wood without a healthy bud or branch nearby.
- Dense shoots from overpruning.
- Poor flowering if the plant was cut back too late or too hard.
- Fungal issues if the canopy stays crowded and airflow is poor.
If you see problems, correct the pruning style next season rather than trying to “fix” it with more heavy cutting.
Can you prune crepe myrtle in summer?
Light summer pruning is fine for removing broken branches, suckers, or spent seed heads if you want a tidier look. But avoid major cuts in summer unless there is a specific reason, because you may reduce flowering and stimulate awkward regrowth.
If you want better blooms, save the main pruning for late winter or early spring and keep summer work minimal.
Quick pruning checklist
- Prune in late winter or very early spring.
- Remove dead, damaged, and crossing branches first.
- Keep the plant’s natural shape.
- Avoid topping and severe shearing.
- Use clean, sharp tools.
- Adapt timing to your climate and the plant’s growth stage.
For more pruning guidance, you may also find it helpful to read about when it is too late to prune crepe myrtles and compare timing with other flowering shrubs such as when to prune hibiscus.
If you remember one rule, make it this: prune crepe myrtle while it is still dormant, just before spring growth begins. That timing gives you the best balance of shape, health, and flowers. Start with the dead and crowded wood, keep cuts selective, and let the plant keep its natural form.